How to Properly Calibrate Your Brewing Equipment
Contents
- How to Properly Calibrate Your Brewing Equipment
- Key Takeaways:
- What Equipment Needs to be Calibrated?
- 3. Refractometers
- 4. pH Meters
- How Often Should Brewing Equipment be Calibrated?
- 1. Scales and Thermometers
- 2. Refractometers and pH Meters
- How to Calibrate Scales for Brewing
- 1. Check the Scale’s Accuracy
- 2. Use Calibration Weights in Your Brewing System
- How to Calibrate Refractometers for Accurate Brewing Measurements
- How to Calibrate pH Meters for Brewing
- Ready to elevate your homebrewing game? Here are some key tips for successful calibration.
- Frequently Asked Questions
- How often should you calibrate your brewing equipment?
How to Properly Calibrate Your Brewing Equipment
Proper calibration of your brewing equipment is crucial for achieving consistent, high-quality results in your homebrewing endeavors.
Whether you re a dedicated homebrewer or a seasoned professional, grasping which tools need calibration and mastering the art of effective calibration can profoundly impact your final product and overall brewing process.
This guide outlines the essential equipment that requires calibration scales, thermometers, refractometers, and pH meters and offers you step-by-step instructions to ensure accuracy.
You will also discover valuable tips to maintain your brewing equipment in peak condition for every batch, ensuring that each brew is your best yet, optimizing your brewing system and techniques.
Key Takeaways:
- Consistently calibrating brewing equipment ensures accurate measurements and reliable data.
- Scales and thermometers should be calibrated before each use, while refractometers and pH meters can be calibrated less frequently.
- To properly calibrate equipment, use appropriate calibration weights, solutions, and follow the manufacturer’s instructions for adjustments.
What Equipment Needs to be Calibrated?
In the world of homebrewing, you must prioritize the accuracy of your brewing equipment to craft high-quality beer, maintaining accurate measurements and achieving ideal fermentation process conditions. Calibrating essential tools like scales, thermometers, refractometers, and pH meters directly influences your brewing targets, including mash efficiency (the effectiveness of extracting sugars during the mashing process), precise measurements, and the entire fermentation process.
It’s important to grasp how each piece of equipment plays a role in your brewing system, from weighing the grain to monitoring the conditions of your fermentation vessel or mash tun. Proper calibration guarantees precision brewing, enhancing crucial variables like boiling point and water treatment, both of which are vital for producing excellent wort and achieving superior beer quality.
1. Scales
Scales are an essential part of your brewing arsenal, ensuring that you achieve precise measurements of grain weight and ingredients for your recipes, which is crucial for accurate brewing calculations.
When you use accurate measurements, you’re not just affecting the flavor and aroma of your final brew; you’re also fine-tuning carbonation levels and alcohol content to perfection, enhancing the overall beer quality.
When selecting a scale, choose one with a capacity that meets your brewing needs and provides precision down to at least 0.1 grams. This level of detail allows you to make careful changes to your recipes.
Proper calibration is key; diligently follow the manufacturer’s guidelines and routinely check your scale for any inconsistencies, ensuring accurate mash efficiency and fermentation process.
Consistent maintenance is vital as well keeping your scale clean and ensuring it’s stored in a stable environment will promote long-term accuracy. This attention to detail ultimately leads to a high-quality product that will impress both you and your guests.
2. Thermometers
Thermometers are essential in your homebrewing journey, allowing you to meticulously monitor temperatures during critical stages like mashing and boiling in the brewing process.
Accurate calibration of these instruments is crucial for obtaining precise temperature readings, which have a direct impact on the quality of your final brew and target alcohol level.
If your readings are off, you risk encountering fermentation issues that could result in undesirable off-flavors and a lower alcohol content, ultimately compromising the overall quality of your creation.
By routinely checking and adjusting your thermometers against reliable reference points, you can rectify any discrepancies that may arise. This level of attention to detail not only promotes a successful fermentation process but also elevates the consistency and flavor profile of your brews.
In the end, mastering precise temperature control is the key to perfecting your homebrewing craft.
3. Refractometers
Refractometers are important tools for homebrewers, offering you swift insights into the sugar concentration of your wort through hydrometer readings, which are critical for determining specific gravity.
By meticulously calibrating these instruments, you ensure reliable measurements that are essential for determining the appropriate brewing ratios. Calibration typically involves using distilled water or specific calibration solutions to establish a baseline reading. This process is crucial; any discrepancies can lead to misguided calculations that may disrupt the fermentation process.
When your specific gravity readings are sharp and precise, they provide invaluable information for your brewing journey, enabling you to manage ingredients and fermentation times with finesse. As a result, achieving your desired flavor profile and alcohol content becomes far more straightforward, giving you the power to craft your ideal brew with confidence.
4. pH Meters
pH meters are essential tools for homebrewers, enabling you to monitor acidity levels throughout the fermentation process, which plays an important role in shaping the overall flavor of your beer and ensuring accurate brewing targets.
Understanding the intricacies of calibrating these meters with buffer solutions which help keep pH levels stable is vital for achieving accurate readings. Calibration typically involves using solutions with known pH values, ensuring your pH meter delivers precise measurements. A properly calibrated pH meter allows you to maintain optimal acidity, enhancing both the brewing process and the final taste of your beer.
Managing pH levels during water treatment significantly influences various aspects of brewing, such as how well sugars dissolve and the bitterness imparted by hops. By incorporating brewing salts, you can adjust the mineral composition of the water, further refining the pH and contributing to the desired flavor profile of your brew.
How Often Should Brewing Equipment be Calibrated?
Regular calibration of your brewing equipment is crucial for ensuring accurate measurements and successfully hitting your brewing targets. The frequency with which you calibrate can depend on how often you use your equipment, whether it s scales, thermometers, refractometers, or pH meters.
A systematic approach to calibration extends the lifespan of your tools and improves beer consistency. This practice optimizes the fermentation process, ultimately enriching your entire brewing experience.
1. Scales and Thermometers
Scales and thermometers are essential tools in your homebrewing arsenal, and how often you calibrate them directly impacts the accuracy of the measurements critical for your brewing success, including precise control over kettle volume and fermenter volume.
For optimal results, it’s best to calibrate both your scales and thermometers before each brewing session, particularly if you use them frequently. Keep in mind that environmental factors like humidity, temperature fluctuations, and exposure to cleaning agents can diminish their performance over time.
That’s why routine checks and recalibrations are essential to maintain the efficiency of your brewing system, ensuring that every ingredient is measured with precision and that temperatures are just right.
By committing to regular maintenance, you not only elevate the quality of your brew but also reduce the risk of unexpected flavors creeping in due to measurement errors. This ensures a consistently delightful homebrewing experience that lets you create brews you’ll love!
2. Refractometers and pH Meters
Refractometers and pH meters are essential tools for achieving your brewing goals. Regular calibration of these instruments is crucial to ensure they provide trustworthy data.
To achieve optimal performance, calibrate these tools at the start of each brewing session. This is especially important when you anticipate changes in ingredients or brewing conditions. Even minor discrepancies in measurements can significantly impact the fermentation process, potentially resulting in off-flavors or insufficient alcohol levels.
Neglecting regular calibration can lead to misleading readings that disrupt your recipe formulation. This affects everything from sweetness to acidity. By maintaining precise calibration, you enhance consistency in your brewing results and elevate the overall quality of your final product.
How to Calibrate Scales for Brewing
Calibrating your brewing scales is a simple yet essential process that guarantees accurate measurements. This is crucial for effective brewing calculations and recipe formulation, ensuring precise management of yeast slurry and sugar types.
Begin by verifying the scale’s accuracy using calibration weights specifically designed for this task. This practice is particularly important for homebrewers seeking precision in their brewing system. Even slight discrepancies can lead to significant variations in your beer’s quality and fermentation outcomes.
Once you’ve confirmed the scale’s accuracy, make any necessary adjustments to ensure it consistently delivers reliable readings.
1. Check the Scale’s Accuracy
Checking the accuracy of your scale is the essential first step in ensuring that your brewing equipment provides reliable measurements throughout the brewing process. This includes accurate boiling processes and target volume control.
This crucial practice enhances the consistency of your brews and helps you avoid the frustrations of off-flavors that can stem from improper dosing.
To verify your scale’s precision, use calibration weights designed to match known masses. By placing these weights on the scale, you can compare the readout to the actual weight and easily identify any discrepancies.
Interpreting the results is straightforward. If the readings deviate significantly from the expected values, it s a clear sign that your scale needs recalibration or even replacement. By regularly monitoring your scale’s performance, you ensure that every brew you craft maintains the quality and taste you aspire to, transforming each cup into a delightful experience.
2. Use Calibration Weights in Your Brewing System
Using calibration weights is crucial for accurately calibrating scales in your homebrewing endeavors. This ensures that you achieve precise measurements for your brewing targets, such as mash efficiency and alcohol level.
These weights act as essential reference points, enabling you to verify that your scales provide reliable readings throughout the brewing process. When selecting calibration weights, it s important to choose ones that align with your scale s capacity and sensitivity requirements. Using weights that are too light or too heavy can lead to incorrect adjustments that disrupt your entire brew.
To use these weights effectively, simply place them on the scale and adhere to the manufacturer s calibration instructions. This practice helps eliminate potential errors and inconsistencies. By prioritizing this aspect of brewing, you can significantly enhance the quality and consistency of your final products, resulting in a more rewarding brewing experience.
3. Adjust the Scale’s Calibration
Having verified the scale’s accuracy with calibration weights, your next step is to adjust the calibration to ensure it provides reliable readings for your brewing calculations.
This process generally entails accessing the scale s calibration mode, a special setting that may differ depending on the manufacturer. Follow the prompts outlined in the user manual, factoring in any water treatment protocols.
Most seasoned homebrewers recommend using certified calibration weights that correspond to the scale s capacity, guaranteeing precision during the adjustment.
It s crucial to conduct these calibrations regularly, especially when the scale encounters significant temperature fluctuations or has been relocated.
Keeping your scale clean can also improve its measurement accuracy over time. This ultimately elevates the quality of your homebrewed creations by ensuring accurate brewing calculations and a more precise alcohol content.
How to Calibrate Thermometers for Accurate Brewing Measurements
Calibrating thermometers for brewing is essential to ensure measurement accuracy during critical stages of the brewing process, like mashing and boiling, and to accurately determine the boiling point and temperature correction needed.
You have two primary options for calibration: the ice bath method and the boiling water bath method.
Employing these techniques ensures that your thermometer delivers precise readings, which can greatly influence temperature-sensitive elements of brewing think boiling points and fermentation dynamics.
By adhering to these calibration methods, you’ll elevate your precision in brewing and ultimately achieve the exceptional beer quality you desire.
1. Use an Ice Bath
An ice bath is a simple and powerful way to ensure your thermometer is spot on for the fermentation process.
To create the ideal ice bath, fill a container be it a bowl or a pitcher with a mixture of crushed ice and water. Aim for a ratio of about two parts ice to one part water, allowing the ice to float freely in the chilled liquid.
When it comes time to calibrate, check your thermometer s accuracy by submerging it in this ice bath and confirming that it reads 32 F (0 C). Before you dip into this process, ensure that you properly calibrate the thermometer by immersing it in the ice bath until it stabilizes. This step is essential in determining whether any adjustments are needed.
This procedure not only helps you achieve the perfect temperature but also ensures that your temperature readings during brewing are reliable. Ultimately, this leads to superior fermentation and enhanced product quality, impacting the final beer quality and fermentation losses.
2. Use a Boiling Water Bath for Calibration
The boiling water bath method is a highly effective technique for calibrating thermometers in homebrewing, emphasizing the importance of verifying the boiling point for accurate measurements.
This process is crucial for any brewer who seeks to achieve precision in their recipes, as even minor temperature discrepancies can significantly alter the flavor profile of the final product.
To set it up, fill a pot with water and place it on the stove, ensuring that your thermometer is positioned so it doesn t touch the bottom of the pot but remains fully submerged in the water. During this step, you can expect the thermometer to read around 212 F (100 C) at sea level; however, if you re brewing at higher altitudes, you ll need to make adjustments since water boils at lower temperatures.
To ensure your thermometer s accuracy, compare its reading against a calibrated reference thermometer or a hydrometer for better precision in brewing. Adjust as needed by turning the adjustment screw or following the manufacturer s instructions, thereby guaranteeing you a precise and rewarding brewing experience.
3. Adjust the Thermometer’s Calibration

Adjusting the thermometer’s calibration is the final step you should take after employing the ice bath or boiling water bath methods. This ensures accuracy in your brewing equipment.
Once you receive the calibration results, it’s essential to make any necessary adjustments to achieve precise temperature readings. These readings directly influence the quality of your brew. Be cautious of common pitfalls, such as skipping this adjustment in your eagerness to start brewing or misinterpreting the calibration readings due to incorrect ambient conditions.
Make it a habit to regularly check and recalibrate your thermometer to ensure every brew is exceptional! This practice not only helps you maintain consistent brewing techniques over time but also enhances the richness of the flavors extracted from your beans. Embracing this proactive approach can significantly elevate your overall brewing experience.
How to Calibrate Refractometers for Accurate Brewing Measurements
Calibrating your refractometer for brewing is crucial for obtaining accurate hydrometer readings and measuring sugar concentrations in your wort. These factors directly impact your specific gravity and fermentation results.
This process usually entails using distilled water along with a calibration solution to confirm that your refractometer delivers precise readings. This accuracy is vital for determining sugar types and fine-tuning your fermentation results.
Proper calibration influences your brewing process, affecting factors like specific gravity and overall brewing calculations, as well as mash tun efficiency and fermenter volume accuracy. As a homebrewer, prioritizing this calibration is key to achieving the exceptional quality of beer you aim for.
1. Use Distilled Water
Using distilled water is vital for accurately calibrating refractometers. This ensures that your readings are both accurate and reliable throughout the brewing process, particularly in determining grain weight and brewing liquor.
The purity of distilled water is essential, as it is free from minerals or contaminants that could distort your results. This guarantees precise adjustments and enhances the quality of your beer.
By employing distilled water as a calibration standard, you establish a solid baseline. This allows you to compare the refractive index of your samples against a reference that reflects solely the liquid you re measuring. As a result, you can make precise adjustments and ensure that your measurements accurately represent the solution being analyzed, ultimately enhancing consistency in your production.
In a realm where even minor variations can significantly affect taste and quality, using this pristine reference eliminates uncertainty from your calibration process.
2. Use a Calibration Solution
Using a calibration solution is essential for ensuring the accuracy of refractometers in your homebrewing endeavors. This enables precise hydrometer readings and better control over your brewing system.
To effectively utilize a calibration solution, prepare it according to the specific guidelines set forth by the manufacturer. This often entails diluting the solution to the correct concentration, ensuring it closely mimics the samples you ll be testing. Following the manufacturer s instructions is crucial; even minor deviations can dramatically skew your results.
When calibrated correctly, your refractometer will provide reliable specific gravity measurements. These are vital for accurate brewing calculations, ultimately enhancing the quality and consistency of your final product by allowing more precise control over sugar types and fermentation vessel settings.
This meticulous attention to detail directly influences your ability to replicate successful batches, elevating your brewing game to new heights and ensuring better control over brewing targets and water usage.
3. Adjust the Refractometer’s Calibration
Get ready to perfect your brewing game by adjusting the refractometer’s calibration! This final step ensures your readings are accurate when measuring sugar types and specific gravity in your wort. It s essential to adjust for trub loss and kettle volume.
This essential process gives you the power to fine-tune your measurements and paves the way for optimal fermentation results, enhancing the overall quality of your product.
As you interpret calibration results, it s crucial to make meticulous adjustments. Even the slightest discrepancies can lead to significant variations in your final brew.
You may encounter common challenges during this adjustment phase, such as variations in ambient temperature, equipment wear, improper prior calibration, or trub loss (the sediment left at the bottom of the kettle after boiling), all of which can skew your readings.
By regularly maintaining your calibrated equipment, you can confidently navigate these hurdles. Consistency and precision are key throughout the brewing process!
The importance of calibrating your tools cannot be overstated; it contributes to the creation of exquisite craft beers and maintaining accurate measurements.
How to Calibrate pH Meters for Brewing
Calibrating pH meters is an essential practice in homebrewing that guarantees accurate pH level monitoring throughout your brewing journey. This procedure typically requires pH buffer solutions to standardize your readings and validate the accuracy of your meter.
Maintaining the correct pH levels is crucial for effective water treatment, as it directly influences the fermentation process and the flavor profile of your final beer. By meticulously calibrating your pH meters, you can greatly enhance your brewing techniques and achieve the exceptional beer quality you desire.
Understanding the calibration method for your specific brewing system can further improve your results.
1. Use a pH Buffer Solution
Utilizing a pH buffer solution is essential for accurately calibrating your pH meter, ensuring that your readings truly reflect the acidity levels in your brewing process.
To start, you ll want to select the appropriate buffer solutions, which are typically available at various pH values that correspond with the expected range of your samples. When you prepare for calibration, it s crucial to clean the pH probe thoroughly and rinse it with distilled water to avoid any contamination. Adhering to the manufacturer s recommendations will help ensure that your pH meter operates at its best, delivering precise readings.
Also, consider the mashing process and other brewing phases where pH plays a significant role.
Once you ve adjusted the calibration settings with fresh buffers, you can move forward with your measurements confidently. Just remember to consider the shelf life and storage conditions of those buffer solutions to maintain their effectiveness.
2. Adjust the pH Meter’s Calibration
Adjusting the pH meter’s calibration after using a pH buffer solution is crucial for ensuring that your readings are both accurate and reliable throughout the brewing process.
When calibrating, it’s wise to utilize at least two buffer solutions that encompass the expected pH range of your must or mash. After setting the meter to these known standards, you should follow common troubleshooting steps, such as checking for any electrode issues or ensuring the meter is clean and functioning properly. Even minor faults can skew your measurements and lead to undesirable outcomes.
Regular calibration impacts fermentation quality and ensures yeast health and flavor development. By making this practice a routine part of your brewing process, you elevate the consistency and taste of your final product to a whole new level. Moreover, precise calibration helps in achieving your brewing targets, such as desired alcohol content and beer quality.
Ready to elevate your homebrewing game? Here are some key tips for successful calibration.
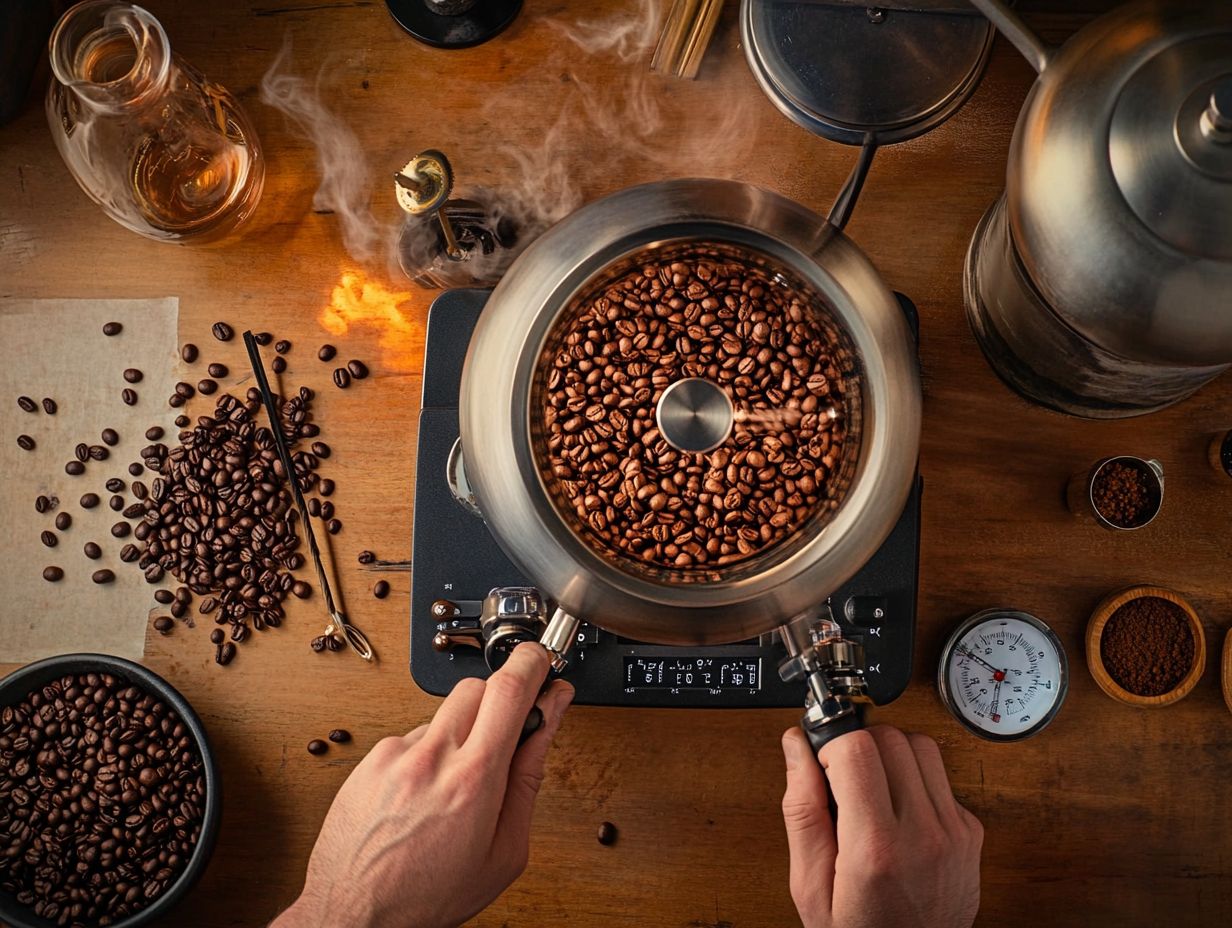
Successful calibration of your brewing equipment demands careful attention to detail and a commitment to best practices. These factors play a pivotal role in the quality of your homebrew.
To achieve optimal results, ensure that your equipment is impeccably clean before calibration. Diligently follow the manufacturer’s instructions and use fresh calibration solutions to guarantee accuracy.
Each of these steps is essential for maintaining measurement precision and optimizing critical brewing variables, such as alcohol content and mash efficiency. By adhering to these vital tips, you can elevate your precision brewing and consistently achieve the exceptional beer quality you desire.
1. Keep Equipment Clean
Maintaining the cleanliness of your brewing equipment is essential for achieving successful calibration. Contaminants can severely impact the accuracy of your measurements.
When every piece of gear, from your grinders to your brew kettles, is immaculate, you not only secure precise measurements but also elevate the overall quality of each brew you create.
It’s vital to establish a routine that incorporates thorough cleaning after every use, along with periodic deep cleans.
For example, use specialized cleaning solutions that are safe for your equipment’s materials to effectively eliminate stubborn coffee oils and mineral buildup that can detract from flavor.
This practice will also protect the fermenter volume and ensure measurement accuracy.
2. Follow Manufacturer’s Instructions
Following the manufacturer’s instructions is essential for achieving a precise calibration process in homebrewing. Each piece of equipment comes with its own specific requirements.
These unique specifications often involve critical elements such as temperature settings, measurement units, and timing guidelines. Each plays a vital role in crafting the perfect brew.
By meticulously interpreting and applying these directions, you can enhance measurement accuracy, which directly impacts the flavor profile and consistency of your final product.
Sticking to these recommended practices not only improves the quality of your brew but also extends the lifespan of your equipment. This allows you to relish your craft for years to come.
Ultimately, taking the time to consult and follow these guidelines is an invaluable investment in your brewing success. It helps in achieving brewing targets such as specific gravity and fermentation losses.
3. Use Fresh Calibration Solutions
Utilizing fresh calibration solutions is absolutely essential for the effective calibration of your brewing equipment. Relying on outdated solutions could lead to inaccurate readings that compromise your craft.
Sourcing and storing these solutions properly can significantly enhance their effectiveness. It s crucial to obtain calibration solutions from reputable suppliers who uphold stringent quality standards.
Once you have sourced these solutions, store them in a cool, dark place to prevent any degradation.
Regularly check expiration dates and employ proper handling techniques like avoiding cross-contamination to maintain their integrity.
Fresh solutions are vital because they directly influence measurement accuracy. Even minor discrepancies can skew brewing parameters, ultimately affecting the flavors and consistency of your brews.
By adhering to these guidelines, you ensure that your brewing practices remain reliable, consistently delivering the quality you desire in every cup. Consider how accurate measurements can impact processes such as wort production and boiling, where accurate measurements are crucial.
Frequently Asked Questions
What does it mean to calibrate your brewing equipment?
Calibrating your brewing equipment involves adjusting and verifying the accuracy of the measurements and settings on your equipment. This ensures consistent and optimal results in your brewing process.
Why is it important to calibrate your brewing equipment?
Calibrating your brewing equipment is important because it allows you to achieve consistent and accurate results in your brewing process. This ensures that your beer will have the desired flavor, aroma, and alcohol content every time you brew.
How often should you calibrate your brewing equipment?
Always calibrate your brewing equipment before each use, especially for commercial brewing. This ensures the quality and consistency of your beer remain top-notch!
What are some signs that your brewing equipment needs to be calibrated?
Watch for inconsistent results in the flavor, aroma, or alcohol content of your beer, and variations in the temperature or pressure readings on your equipment. These are clear indicators that calibration is necessary.
Can you calibrate your brewing equipment on your own?
Yes, you can calibrate your brewing equipment on your own if you have the necessary tools and knowledge. However, it is advisable to have a professional calibration service perform the calibration for more accurate results.
What are the most important components of brewing equipment that need to be calibrated?
The most important components of brewing equipment that need to be calibrated include temperature sensors, pressure gauges, flow meters, and pH meters. These elements play a crucial role in the brewing process and can greatly affect the quality of your beer if not calibrated properly. Hydrometer calibration is vital for measuring specific gravity, which refers to the density of the liquid compared to water, and achieving desired alcohol levels.
