How Do I Brew a Lager at Home?
Contents
- Guide to Brewing Lagers at Home
- Key Takeaways:
- What are the Different Types of Lagers?
- What Equipment Do I Need to Brew a Lager at Home?
- What Ingredients Do I Need to Brew a Lager at Home?
- How Do I Brew a Lager at Home?
- 6. Bottle or Keg the Lager: Final Steps in the Brewing Process
- How Long Will it Take to Brew a Lager at Home?
- 1. Primary Fermentation (1-2 Weeks)
- 2. Secondary Fermentation (2-4 Weeks)
- How Do I Know When My Lager is Ready to Drink? Quality Assurance and Final Checks
- What are Some Common Mistakes to Avoid when Brewing a Lager at Home?
- What are Some Tips for Brewing a Successful Lager at Home?
- Frequently Asked Questions
- What equipment do I need to brew a lager at home?
- What temperature should I ferment my lager at?
- How long does it take to brew a lager at home?
- Can I use the same equipment for brewing a lager and an ale?
- What is the difference between a lager and an ale?
- Do I need to use special ingredients for brewing a lager at home?
Guide to Brewing Lagers at Home
Lagers are a cherished category of beer, renowned for their crispness and refreshing flavors that appeal to many.
Whether you re an experienced homebrewer or just starting on this exciting journey, grasping the nuances of the various types of lagers from Pale Lager to M rzen can significantly elevate your homebrewing experience. Understanding brewing techniques and the fermentation process is crucial.
Ready to brew? Let s dive into the essential equipment and ingredients you’ll need to craft your own lagers at home, complete with step-by-step brewing instructions and tips for adjusting fermentation temperatures and other variables.
You ll also uncover common pitfalls to avoid, such as managing diacetyl levels, along with valuable tips to perfect your brew, including the importance of a process to reduce off-flavors before bottling.
Prepare to raise a glass to your brewing adventure!
Key Takeaways:
- Lager brewing requires specific equipment and ingredients, including a brew kettle, fermentation vessel, malt, hops, lager yeast, and water.
- Brewing a lager involves sanitizing equipment, heating water, adding grains, adding hops, fermenting, conducting a process to reduce off-flavors, and bottling or kegging.
- Patience is key when brewing a lager at home, as it can take up to 9 weeks for the entire brewing process, including primary fermentation, a diacetyl rest, secondary fermentation, and bottle conditioning.
What are the Different Types of Lagers?
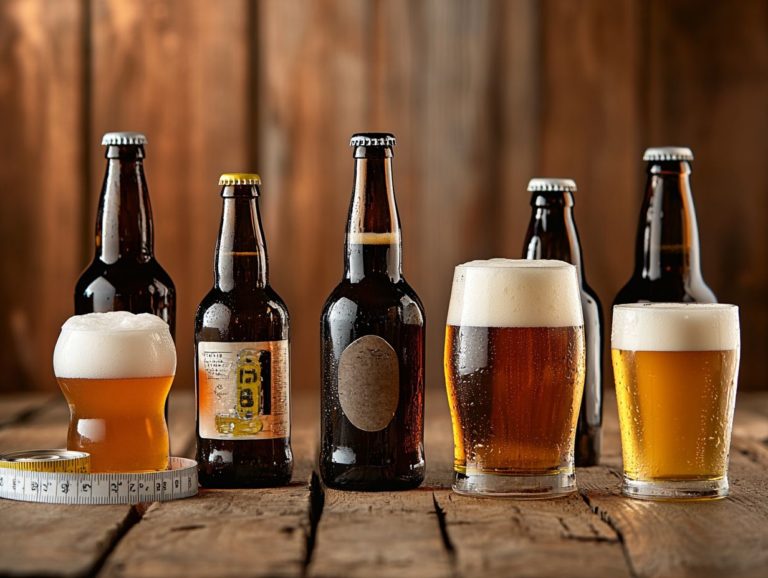
Lagers represent a fascinating and diverse category of beer, distinguished by their bottom fermentation and refreshing flavors. You can categorize them into various types, each with its own unique qualities and brewing styles.
Among the most popular types are:
- Pale lagers
- Pilsners
- Bocks
- Dunkels
- M rzens
Each type boasts distinct differences in ingredients, fermentation processes, and desired flavors. By grasping these differences, you empower yourself to explore a wide array of brewing styles and techniques, enabling you to craft clean and invigorating beers, whether at home or in a commercial setting.
1. Pale Lager
Pale lagers are your go-to light, crisp beers that undergo bottom fermentation with lager yeast, delivering a clean and refreshing taste that s hard to resist.
You’ll notice these beers typically feature a subtle hop aroma and a mild malt flavor, making them incredibly easy to drink. The brewing process involves cooler fermentation temperatures, resulting in a smoother finish while keeping those fruity esters at bay.
Common ingredients include pale malts, corn or rice adjuncts, and noble hops, with iconic brands like Budweiser perfectly exemplifying this style. This versatility is what makes pale lagers a favorite around the globe, ideal for casual social settings and gatherings.
Their refreshing qualities pair beautifully with a wide range of foods, enhancing your overall dining experience and making every sip a pleasure.
2. Pilsner
Pilsner is a distinguished type of pale lager celebrated for its hoppy aroma and flavor, achieved through precise fermentation temperatures and meticulous quality assurance practices. Iconic brands like Sam Adams and Budweiser are prime examples of this beer style.
This iconic style traces its roots back to the Czech city of Pilsen in the mid-19th century, and it has ascended to global popularity thanks to its refreshing qualities and crisp finish.
The brewing process of pilsner requires a delicate balance of pale malt, noble hops, and a bottom-fermenting yeast that operates at cooler temperatures than other lagers. This careful method results in a clean taste and a radiant, golden hue.
Unlike other lagers that may lean into malt sweetness or a heavier body, pilsner stands out with its pronounced hop bitterness and a lively mouthfeel, making it a beloved choice among discerning beer enthusiasts.
Now, gather your ingredients and start brewing your first lager the process is just as enjoyable as the final product!
3. Bock
Bock is a robust lager that typically boasts a rich malt profile. It undergoes a longer fermentation process, leading to a complex flavor that sets it apart from lighter lagers.
As you explore the various sub-styles of Bock, you ll uncover distinct flavor nuances that significantly enhance your overall experience. Traditional Bocks, like M rzen, offer a delightful malty sweetness with hints of caramel. If you venture into the world of Doppelbock, you ll discover a stronger variant that showcases deeper malt flavors and a subtle touch of dark fruit. Other styles include Schwarzbier and Vienna Lager.
For those who seek something even more exceptional, the Eisbock takes things up a notch. This brew removes ice to concentrate the flavors. The result is an incredibly rich and potent experience. Brewing techniques such as decoction mashing add layers of complexity and develop the toasty, nutty notes that are characteristic of this lager style. Employing a temperature control system during fermentation enhances lager quality.
Each sub-style invites you to savor and appreciate the diverse range of flavors that Bock has to offer.
4. Dunkel
Dunkel is a traditional German dark lager that presents you with a rich, malty flavor profile, enhanced by subtle hints of caramel and toffee. No wonder beer lovers can t get enough of this style!
Typically brewed with Munich malt, Dunkel boasts a deep amber to dark brown hue. This color is achieved through a slow fermentation process that cultivates smooth, mellow flavors. Unlike other lagers that often veer toward a crisp and clean finish, Dunkel embraces warmth and complexity. It offers delightful undertones of chocolate and lightly roasted coffee.
When you compare it to lighter varieties like Helles or Pilsner which flaunt a more assertive hop character you’ll find Dunkel’s blend of sweetness and mild bitterness delivers a uniquely comforting drinking experience. This delightful contrast makes it an ideal companion for hearty German dishes, elevating both the culinary and beer experience to new heights.
5. M rzen
M rzen, traditionally brewed in March and served during Oktoberfest, is a medium to full-bodied lager that captivates with its rich amber color and perfectly balanced malt character.
Originating in Germany, M rzen boasts a fascinating history that stretches back to the early 16th century. It was brewed as a clever way to preserve beer through the warmer months when brewing was practically off the table due to rising temperatures. This style utilizes unique fermentation methods and features a slightly higher alcohol content, making it a delightful choice for any occasion.
The traditional lager yeast used in M rzen varieties imparts distinct flavors that dance on your palate. Often, you can expect notes of toasty malt, caramel, and just a whisper of hops. Its significance in beer culture transcends Oktoberfest, as many craft brewers have embraced and adapted these techniques. They honor this iconic style and its profound influence throughout history.
What Equipment Do I Need to Brew a Lager at Home?
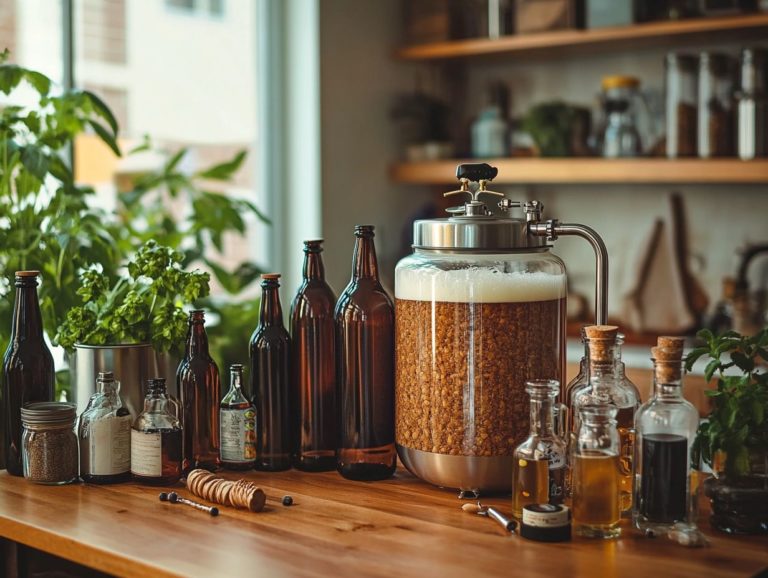
To successfully brew a lager at home, you must invest in specific brewing equipment that enhances the fermentation process. This equipment allows for precise temperature control, ensuring the yeast operates at its best. Utilizing a fermentation chamber or temperature controllers can greatly aid in maintaining the necessary cold storage conditions for optimal lagering.
Essential items include:
- A brew kettle for boiling the wort. It should preferably have a capacity to handle boil-over incidents.
- A fermentation vessel to contain the fermenting beer. You can choose options like stainless steel conicals or plastic fermenters.
- An airlock to keep contamination at bay.
- A hydrometer for measuring specific gravity and monitoring the alcohol content.
- A thermometer for monitoring fermentation temperature.
Equipping yourself with the right tools is essential for crafting high-quality lagers that are both clean and flavorful. Additionally, utilizing a yeast starter can improve yeast activity during primary fermentation.
Now that you know what equipment you need, it s time to start your brewing journey! With the right tools and a bit of passion, you’ll soon be enjoying your homemade lagers.
1. Brew Kettle
A brew kettle is essential for boiling wort, marking the initial step in the brewing process where you blend malt extracts with water. This step is crucial for developing the flavors that will emerge during the fermentation and conditioning phases.
Selecting the right brew kettle can profoundly impact the quality of your finished beer. You ll find a variety of options, including stainless steel, aluminum, and enameled kettles, each with its unique advantages and drawbacks. Stainless steel, for instance, boasts durability and corrosion resistance, while aluminum kettles offer the benefits of being lightweight and budget-friendly. It’s vital to consider the size of the kettle; a larger kettle not only accommodates bigger batch sizes but also helps you manage those pesky boil-over incidents.
To make the most of your brew kettle, adopt best practices such as keeping your equipment spotless, carefully monitoring temperatures, and steering clear of harsh detergents that could leave undesirable residues in your brewing environment.
2. Fermentation Vessel
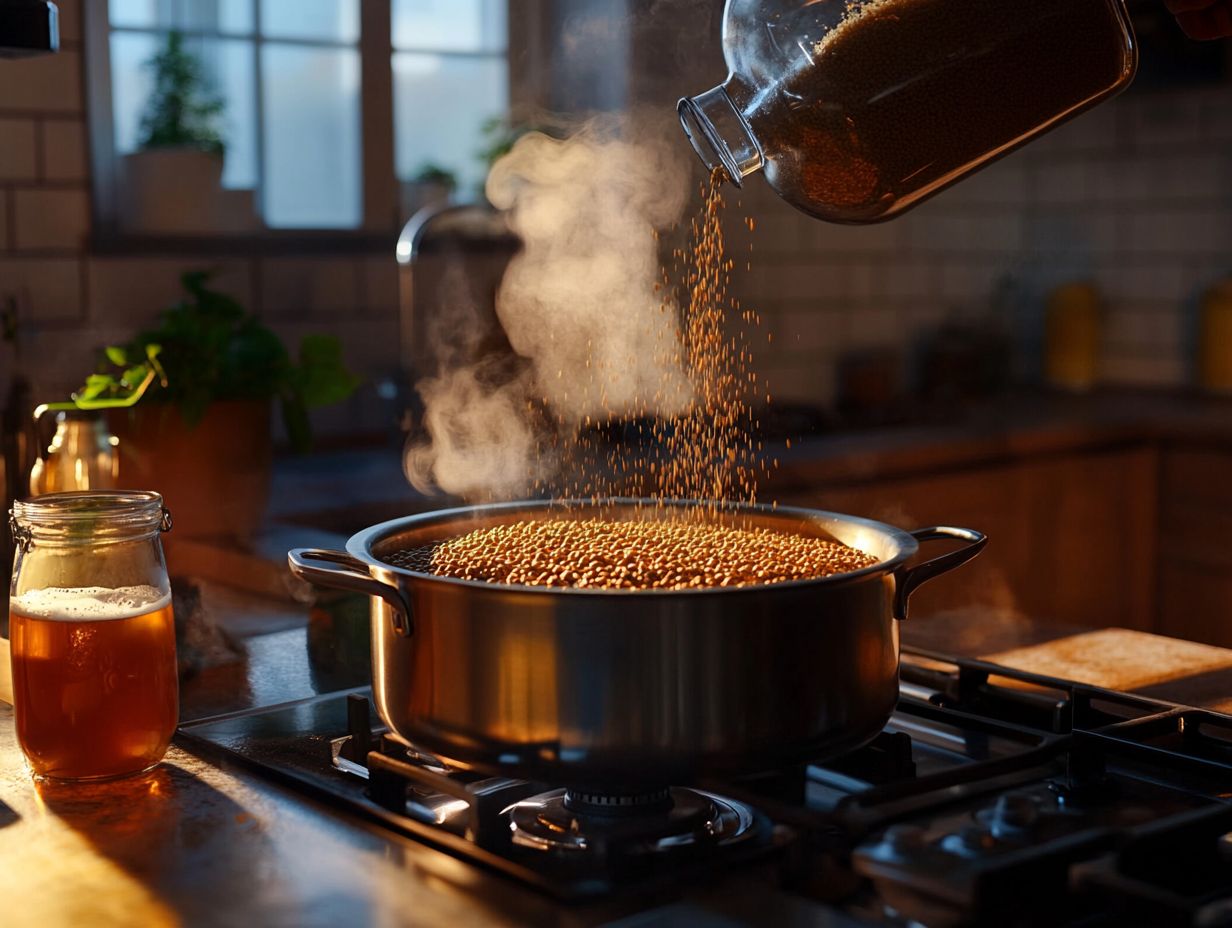
The fermentation vessel plays a pivotal role in both the primary and secondary fermentation stages, creating a controlled environment that is essential for optimal yeast activity. Ensuring a clear understanding of the process steps involved can help in achieving consistent and high-quality results.
You ll find these vessels in various types, such as stainless steel conicals, glass carboys, and plastic fermenters, each offering its own distinct advantages. For example, stainless steel vessels, typically ranging from 5 to 15 gallons, provide precise temperature control and superior sanitation, which can significantly enhance the flavor profile of your brew. On the other hand, glass carboys, usually holding between 5 to 6 gallons, allow you to visually monitor the fermentation process, making them a popular choice among homebrewers. Using a strain like Saflager W-34/70 can also improve the efficiency and outcome of your home brewing process.
The vessel you choose will directly influence not just the speed of fermentation and flavor development, but also the overall quality of your beer. Therefore, it s crucial to select your brewing equipment with care to ensure the best possible outcomes for your brewing endeavors.
3. Airlock
An airlock is an essential tool in your brewing arsenal, allowing carbon dioxide to escape during fermentation while expertly keeping outside air and contaminants at bay. This is vital for maintaining a clean beer environment.
This simple yet brilliant device usually features a chamber filled with water or sanitizer, effectively creating a protective barrier against any unwanted bacteria and wild yeast. You’ll find various types of airlocks on the market, such as the S-shaped airlock, which provides a reliable way to observe fermentation activity, or the 3-piece airlock, designed for easy cleaning and maintenance.
By understanding how each type functions, you can significantly elevate your fermentation experience, ensuring that you maintain the anaerobic environment essential for yeast health. The importance of utilizing an airlock cannot be overstated; it plays a crucial role in producing high-quality brews that are free from spoilage.
4. Hydrometer
A hydrometer is an essential tool in your brewing arsenal, allowing you to measure the specific gravity of the wort and providing vital information about the fermentation process. This instrument not only sheds light on the sugar content of the wort but also serves as a reliable indicator of whether fermentation is progressing as it should.
To use a hydrometer effectively, start by taking a sample of the wort, making sure it s at the right temperature for precise readings. As fermentation unfolds, you ll notice the specific gravity declining, offering crucial insights into the efficiency and health of the yeast during the primary fermentation.
By regularly monitoring these readings, you can make necessary adjustments, uphold quality standards, and ultimately craft a more consistent and flavorful final product a true testament to your skill and commitment to brewing excellence.
5. Thermometer
A thermometer is essential for you to monitor temperature throughout the brewing process, as maintaining the right temperature is crucial for achieving optimal fermentation conditions.
Proper temperature management allows the yeast to flourish, directly impacting the flavor, clarity, and overall quality of your lager. You have a variety of thermometer options at your disposal, including digital, analog, and infrared models, each providing unique advantages based on your brewing setup.
Opting for a digital thermometer can yield precise readings, making it easier for you to fine-tune adjustments during fermentation. Best practices suggest that you regularly calibrate your thermometer for accuracy, monitor temperatures at various stages of brewing, and maintain a consistent environment to avoid fermentation stalls.
Keep in mind that your careful attention to temperature can elevate your homebrew from merely good to truly exceptional. Proper temperature control is essential during both the primary and secondary fermentation stages.
What Ingredients Do I Need to Brew a Lager at Home?
Brewing a lager at home demands a curated selection of ingredients, each playing a vital role in crafting its distinctive flavor profile and characteristics. At the heart of this process is malt, which acts as the backbone of your brew by supplying the sugars essential for fermentation. Hops are equally important, imparting bitterness, aroma, and depth of flavor that elevate the overall experience. Utilizing lager yeast ensures bottom fermentation, producing the clean and crisp flavors typical of lagers.
Don t overlook the significance of lager yeast; it s crucial for bottom fermentation, delivering those clean and crisp flavors you desire. Additionally, the quality of the water you use can profoundly influence the final product. Grasping the function of each ingredient is fundamental to mastering the art of lager brewing.
1. Malt
Malt serves as the cornerstone of fermentable sugars in beer, playing a crucial role in determining the flavor, color, and body of your lager, as well as influencing its overall alcohol content. The choice of malt can also affect the lagering process.
Various types of malt are essential in crafting the character of your brew. For example, base malts like Pilsner and Pale impart lighter, bready flavors that create the backbone of many lagers. Specialty malts, such as Munich or Vienna, bring in richer, caramelized notes while enhancing the golden hues of the beer. Meanwhile, dark malts add complexity with delightful chocolate or roasted undertones, impacting both aroma and taste.
Each malt variety boasts unique enzymatic properties that influence not only the extraction of sugars during mashing but also the delicate balance of sweetness, bitterness, and mouthfeel in the final product. This balance is fundamental to various brewing styles and beer styles, including lagers.
2. Hops
Hops are essential to the brewing process, providing that perfect bitterness to balance the sweetness of the malt while also adding aroma and flavor to your lager.
In lager production, you’ll find a variety of hop types, each bringing its own unique flair. Hops like Saaz, Hallertau, and Tettnang are often favored for their mild bitterness and delightful floral, herbal aromas, which beautifully complement the clean and crisp profile of lagers.
In terms of incorporating hops, brewers usually add them at different stages. Early additions during the boil are all about achieving bitterness, while late additions or dry hopping focus on enhancing those aromatic qualities.
Grasping how hops are used not only allows you to control the final bitterness level but also enriches the sensory experience of the beer, transforming each sip into a delightful journey. Hoppy lagers can showcase a range of flavors and aromas.
3. Yeast
Yeast is the unsung hero of fermentation. It transforms sugars from the malt into alcohol and carbon dioxide while adding distinctive flavors to your lager.
Among the array of strains available, Saflager W-34/70 stands out as a top choice for brewers like you. Its knack for fermenting at cooler temperatures helps produce the clean and crisp flavors that are so beloved in lagers. It thrives in the range of 50 F to 55 F, ensuring that your fermentation process remains both controlled and efficient. Utilizing temperature controllers can help maintain these ideal conditions.
Prioritizing yeast health is essential. Robust yeast cells contribute to superior fermentation performance, resulting in a lager that boasts a harmonious taste and aroma. By ensuring adequate oxygen during the initial stages and providing the right nutrients, you can boost yeast vitality. This paves the way for successful fermentation that ultimately defines the quality of your finished beer. Using a yeast starter can kickstart a strong fermentation.
4. Water
Water is an essential ingredient in brewing, and the quality and composition of this vital resource can profoundly influence the flavor and character of your finished lager.
For you as a brewer, understanding water chemistry is paramount. Elements such as pH, mineral content, and hardness can dramatically impact the brewing process. Take sodium, calcium, and magnesium levels, for example; they can enhance the malt profiles and the crispness of your final product. Meanwhile, the balance of sulfates (which enhance bitterness) and chlorides (which can improve mouthfeel) is crucial in shaping the mouthfeel and bitterness of your lager. This understanding is essential for proper quality assurance.
When selecting water for brewing lagers, consider how its chemical composition will interact with your specific ingredients and the desired outcome of your brew. Making informed decisions can elevate your brewing experience and ensure a remarkable lager.
How Do I Brew a Lager at Home?
Brewing a lager at home is an art that unfolds through a meticulously crafted series of steps. It all begins with sanitizing your equipment, setting the stage for a pristine brewing environment.
Next, you carefully heat the water and add the grains, initiating the extraction of those essential sugars. As you progress, you’ll incorporate hops, cool the wort, and transfer it to a fermentation vessel. Finally, you introduce the yeast to set fermentation in motion.
Pay close attention to every step for the best results! Each step demands your keen attention to detail, ensuring that the lager you create is nothing short of crisp and clean, a true testament to your brewing skill and understanding of the lager process.
1. Sanitize Equipment
Sanitizing your brewing equipment is absolutely essential to prevent contamination and ensure a successful fermentation process. This allows you to create clean beer that truly showcases the rich flavors of your lager. Proper sanitation is also a key aspect of quality assurance in homebrewing.
Without proper sanitation, you’re opening the door to unwanted bacteria and wild yeast, which can spoil your brew and lead to off-flavors or, worse, completely ruined batches. To combat these issues, you can employ various methods such as hot water rinsing, chemical sanitizers, or steam cleaning to effectively eliminate harmful microorganisms. Maintaining hygiene standards is crucial during each step of the brewing process.
Products like Star San or iodophor are often recommended for their effectiveness and ease of use. By maintaining rigorous hygiene standards with these techniques, you’re providing the ideal environment for the yeast to thrive and develop the desired characteristics of your beer. This meticulous approach ultimately results in a superior, more enjoyable drinking experience.
Share your brewing experiences or ask questions in the comments below!
2. Heat Water and Add Grains
Before starting the brewing process, heat water to the optimal temperature. Then, introduce the crushed grains to create wort, which is vital for extracting the sugars necessary for fermentation.
The ideal water temperature for this critical phase hovers between 150 F to 155 F (65 C to 68 C). This range promotes the process that helps break down sugars and ensures that the malted grains impart their fullest malt flavor and sweetness.
When adding the grains, using a method known as ‘mashing in’ can significantly enhance the extraction process. Gently stir the grains as you integrate them into the heated water to prevent clumping, which ensures even saturation and optimal flavor extraction.
Sustain this temperature for about 60 minutes. This duration facilitates the conversion of starches into fermentable sugars, laying the groundwork for a rich and flavorful beer. Many brewers use a fermentation chamber to maintain temperature control during this crucial period.
3. Add Hops to the Brewing Process
Adding hops at various stages of the brewing process significantly influences the bitterness and aroma of your lager, elevating its overall flavor profile. Each method you choose leaves a unique mark on the final product, giving you the power to craft a beer that aligns perfectly with your vision.
For example, when you add bittering hops early in the boil, you achieve that essential bitterness that beautifully balances the sweetness of the malt. Late-hop additions, introduced in the final moments of boiling, infuse your lager with delightful floral and citrus aromas, crucial for enhancing its bouquet.
Dry hopping after fermentation takes the hop aroma to new heights, providing fresh, vibrant notes without substantially increasing bitterness. By mastering the timing and variety of your hop additions, you gain meticulous control over your lager’s flavor nuances, ensuring that each brew offers a distinctive experience that reflects your the skill of brewing.
4. Cool and Transfer to Fermentation Vessel
After boiling, cool your wort quickly to a fermentation temperature suitable for lager yeast. Then, transfer it into a sanitized fermentation vessel to kick off the fermentation process. Using temperature controllers can help you achieve the desired fermentation temperature efficiently.
This swift cooling is vital to stave off unwanted bacteria and create the optimal environment for the yeast to thrive. You have several effective cooling methods at your disposal:
- Immersion chillers, which harness cold water to absorb heat from the wort.
- Counterflow chillers, designed to maintain a continuous flow of cold water for rapid temperature reduction.
Alternatively, ice baths or chill pads can also work wonders. Once the wort is adequately cooled, transfer it carefully into a sanitized fermentation vessel without introducing any oxygen, as this can disrupt the brewing process. By following these best practices, you not only ensure a clean fermentation but also elevate the overall flavor profile of your beer.
5. Add Yeast and Ferment
Once you ve cooled the wort, adding the lager yeast is your next critical step. This is when the fermentation process kicks off, typically lasting anywhere from one to two weeks for primary fermentation.
The success of this phase depends on several key factors, including yeast pitching rates, which should ideally match the specific gravity of the wort to ensure optimal fermentation activity. It’s also crucial to maintain the right fermentation temperatures; any fluctuations can stress the yeast, leading to off-flavors or a stalled fermentation process. For best results, consider starting with a yeast starter to ensure robust fermentation.
The fermentation time is crucial it can make or break your beer’s character! Fermenting for too short a time might leave your brew lacking depth, while letting it go on for too long could introduce undesirable traits. Therefore, striking a careful balance among these elements is essential for crafting a quality lager.
6. Bottle or Keg the Lager: Final Steps in the Brewing Process
Once fermentation is complete, you have the option to either bottle or keg your lager. This allows it to carbonate naturally during the conditioning process. This step not only boosts the flavor but also makes every sip feel amazing!
Storing the beer in a cool place can contribute to the clean and crisp qualities characteristic of quality lagers.
Your choice between bottling and kegging will largely hinge on your personal preference and the experience you want to create. If you choose to bottle, sanitize your bottles carefully. This helps prevent contamination.
When priming, adding a sugar solution can effectively kickstart carbonation. Be sure to measure the sugar accurately; over-carbonation can lead to an explosive surprise when you pop the cap.
On the flip side, kegging allows for carbonation via carbon dioxide (CO2), offering you precise control over the fizziness. No matter which route you choose, remember that patience is vital during the conditioning phase. This time allows the flavors to meld beautifully, resulting in a smoother, well-rounded lager that is perfectly balanced in carbonation ideal for sharing with friends.
How Long Will it Take to Brew a Lager at Home?
The time it takes to brew a lager at home can vary significantly, influenced by the fermentation stages and the specific style you re aiming for. Typically, you re looking at a timeframe that ranges from several weeks to a few months.
Many homebrewing enthusiasts often find that their patience pays off in the form of a superior final product.
Primary fermentation usually spans about 1 to 2 weeks, followed by secondary fermentation, which can add another 2 to 4 weeks. After that, you ll need to factor in an additional 2 to 3 weeks for bottle conditioning before your lager is ready to savor.
Allowing ample time not only enhances the complex flavors but also ensures the clean characteristics that make your lager truly enjoyable.
1. Primary Fermentation (1-2 Weeks)
Primary fermentation usually spans 1 to 2 weeks, a crucial period during which yeast transforms sugars into alcohol and carbon dioxide, ultimately crafting the initial flavor profile of your beer. Using a fermentation chamber can help maintain consistent temperatures for optimal yeast activity.
Several factors significantly influence both the duration of this process and the yeast’s activity level. Temperature plays a vital role; warmer conditions can speed up yeast activity, leading to a quicker fermentation, while cooler temperatures may slow things down.
The yeast strain you choose also matters; it affects the fermentation speed and the complexity of flavors that develop.
If you re working with higher sugar concentrations, expect fermentation to take a bit longer, as yeast will need extra time to fully metabolize those sugars.
Providing the right nutrients enhances yeast health, resulting in a more vigorous fermentation process.
2. Secondary Fermentation (2-4 Weeks)
Secondary fermentation can span from 2 to 4 weeks. This gives your lager the opportunity to mature, clarify, and develop cleaner flavors as the yeast settles and byproducts like diacetyl diminish. This compound can give beer a buttery flavor, which brewers want to minimize.
During this transformative period, your beer undergoes significant changes. Unwanted compounds fade away while the remaining yeast refines the flavor profile.
The result is a lager that showcases enhanced clarity and a smoother mouthfeel, elevating the entire drinking experience. This stage is essential for developing subtle complexities that tantalize the palate, making each sip a delightful exploration.
By allowing for secondary fermentation, you achieve a refined final product and ensure that the flavors harmonize beautifully. This ultimately crafts a lager that will be truly appreciated by those who savor fine craft beer.
3. Bottle Conditioning and Lager Instructions (2-3 Weeks)
Bottle conditioning typically requires an additional 2 to 3 weeks, during which natural carbonation develops as yeast consumes the residual sugars. Not only does this process boost the lager s flavor, but it also improves its mouthfeel, making each sip enjoyable. Ensuring proper quality assurance during this phase is critical for achieving a clean beer.
This critical phase does more than just create carbonation; it helps develop rich flavors, thanks to the contributions of yeast byproducts the compounds left over after yeast consumes sugar, which can add complexity to the flavor. During this time, the lager undergoes subtle transformations that elevate its overall character and enhance its drinkability. Cold storage during this period can further improve its crisp finish.
Breweries often emphasize this technique, understanding that the patience required for bottle conditioning directly links to the superior quality of the final product. By allowing the yeast to work its magic within the bottle, brewers achieve a smoother, creamier texture while ensuring that the flavors meld beautifully, resulting in a well-rounded experience that lager enthusiasts truly appreciate.
How Do I Know When My Lager is Ready to Drink? Quality Assurance and Final Checks
Determining when your lager is ready to drink involves a careful assessment of its clarity, carbonation, and flavor profile. This ensures that the beer has matured adequately for your optimum enjoyment. Many brewers rely on a combination of brewing techniques and sensory evaluation to make this determination.
Your lager should present a bright and clear appearance, devoid of any haze or sediment that could signal incomplete fermentation or aging issues. The level of carbonation is also crucial; a well-crafted lager typically showcases a moderate to high effervescence, delivering a pleasing mouthfeel that enhances your drinking experience. Utilizing temperature controllers and other brewing equipment can help achieve these desired results.
As you take in the aroma, you should notice a delightful balance of malty sweetness and subtle hop characteristics, contributing to a refreshingly crisp scent. When tasting the lager, expect a harmonious blend of flavors that are both refreshing and clean, ideally with a hint of sweetness from the malts, beautifully countered by a light bitterness that lingers pleasantly on your palate.
What are Some Common Mistakes to Avoid when Brewing a Lager at Home?
When you embark on the journey of brewing a lager at home, it s essential to steer clear of common missteps that could jeopardize your final creation. Pay careful attention to sanitation practices, maintain precise temperature control, and ensure you re pitching the right amount of yeast.
Each of these elements plays a pivotal role in crafting the perfect lager, and exploring the best techniques for home brewing lager can elevate your homebrewing experience to new heights.
What are Some Tips for Brewing a Successful Lager at Home?
Brewing a successful lager at home demands keen attention to detail, the appropriate equipment, and a solid grasp of brewing techniques. It’s essential to embrace a generous dose of patience as you navigate the fermentation process, allowing each step to unfold perfectly.
Frequently Asked Questions
What equipment do I need to brew a lager at home?
To brew a lager at home, you will need a large stock pot, a fermenter, a thermometer, a hydrometer, brewing yeast, malt extract, hops, and bottles or a keg for storage.
What temperature should I ferment my lager at?
Lagers ferment at cooler temperatures than ales, typically around 50-55 F. It’s important to maintain a consistent temperature throughout the fermentation process.
How long does it take to brew a lager at home?
The brewing process for a lager typically takes 6-8 weeks, including fermentation and conditioning time. However, the actual active brewing time is only a few hours.
Can I use the same equipment for brewing a lager and an ale?
While some equipment can be used for both lagers and ales, it’s recommended to have separate equipment for each. This helps prevent cross-contamination and ensures the best results for each type of beer.
What is the difference between a lager and an ale?
Lagers are fermented at cooler temperatures and tend to have a cleaner, crisper taste compared to ales. Ales are fermented at warmer temperatures and have a more complex and fruity flavor profile.
Ready to craft your perfect lager? Gather your supplies and enjoy the brewing adventure!
Do I need to use special ingredients for brewing a lager at home?
Yes, to brew a great lager at home, you need specific types of malt and hops to create the right flavor.
You should also use yeast that works best for lagers to ensure proper fermentation.

